Monday, November 28, 2011

Blue and Orange Baby Shower


I ordered the orange and blue balloons from Sweet Shop Lulu and then had
them blown up at my local party store the day before the party.

I also ordered these straws from Shop Sweet Lulu and then found the cups at Hobby Lobby.

I am in love with the "rose" look on cupcakes.
It is super easy to do and makes each cupcake look like a flower.

These are my all time favorite fall muffins - Pumpkin Chocolate chip - YUM.

Chocolate cake with vanilla buttercream - Their was a baby elephant on the
baby shower invite so when I found this little guy at the party store I thought he
would be perfect for the top of the cake. Simple goes a long way.

Some little minis for the ladies who didn't want a whole piece of cake...

Snicker doodle shooters! The little cups are filled with cold milk, very fun for a shower.

The lovely hostesses!

I really do love baking AND creating dessert tables for people. It is a great way for me to be creative and for some reason I love the challenge of organizing the table and really bringing it all to life. This was a great example of how just a few key recipes can help make a really big statement.

I made a cake, cupcakes, muffins, cinnamon buns, and cookies - just 5 key recipes that were pretty manageable to make. I added in some candy in the theme colors and some really beautiful roses that I found that morning at the grocery store that matched the orange perfect! One bunch split into 3 jars down the back center was just enough. Then for the big statement - the balloons. I am such a believer in using these big balloons to make a big impact on a budget. I used them in the green and white baby shower I did a few months ago as well and they couldn't have been a bigger hit. Shop Sweet Lulu has the best color options I have come across.

People always ask me for advice when it comes to making a successful dessert table and I think the most important thing is time management. Always plan your recipes out in advance, make sure you can bake as many of the recipes in before the day of your party. I like to bake one thing each night starting 4 days before the event - you can freeze cake layers in advance and ice the day of, cake balls will last wonderfully in the fridge in an airtight container and most breads can be frozen before your ready to server them as well. This way the morning of your event you aren't waking up at 4am to bake. One day I will do a whole blog post on tips and tricks for dessert tables... stay tuned.

Resources:
Cupcake liners, balloons, and straws: Shop Sweet Lulu
Blue and white polka dot trays: Ikea
Orange and blue cups: Hobby Lobby
Table runner - Hostess owned
Cake stands - My personal collection from over the years.

Thursday, November 10, 2011

Beach Birthday Cake


Before I added the white chocolate shells.

All the shells set and dusted with edible glitter.

The birthday girl!

The demolished cake after they dug in.

It has been far too long since my last post so I wanted to make it a good one. This is one of the best cakes I have ever made so I am very excited to share it. It was for my Creative Director's daughter Isabelle's 14th birthday party. He and his wife wanted it to be a surprise, so they came up with a beach themed cake but also told me she liked neon colors so I did a sand colored buttercream frosting with white chocolate shells and then a basic white cake dyed in different shades of blue for the 4 layers. I love using this technique because it makes the inside of the cake really dramatic. They also told me she liked SpongeBob so I found a SpongeBob candle at the party store they added at the party as a surprise; he fit in seamlessly with the beach theme.

I used candy molds from the cake decorating store for the shells and sea horses. Once they were set I then dusted them with edible glitter to add shine and make them look even more realistic. I crushed graham cracker in the food processor for the sand and made the Happy Birthday flag in Illustrator. I prefer using the flags rather than piping the message on the cake so you can easily remove it. For the cake layers I made a classic white cake and then separated the batter into 4 bowls and dyed each one a shade of blue going from light to dark. The cake was a big hit and I am so proud of it. Hope you guys enjoy it!

Tuesday, October 4, 2011

Pinkalicious Cupcakes


I was recently asked to make cupcakes for a little girls birthday party that was Pinkalicious themed. Apparently there is this whole world of children's books that I didn't know about. There is not only Pinkalicious, but there is also Purplicious, Goldlicious, Silverlicious... all equally popular. In the Pinkalicious story a little girl eats too many pink cupcakes causing her to turn pink- The only cure is to eat vegetables! Those tricky authors :-)

The plan was to match the cupcakes in the book as closely as possible. I used chocolate cupcakes since the birthday girl herself requested they be chocolate, and a classic buttercream with pink food coloring. In the book each cupcake had a cherry on top but since regular cherries run everywhere I rolled them in sugar the night before and put them in the fridge uncovered to help dry them out a little - very sweet but very cute. A dash of pink and white sprinkles and voila! Pinkalicious cupcakes. I also dipped strawberry marshmallows in pink white chocolate and sprinkles for marshmallow pops. Jill at Stamped Paper co made the adorable crown toppers to add to the theme. I hope these ideas inspire you if you are planning a Pinkalicious party...

Going to Cabo!


Click on the template to download the larger version


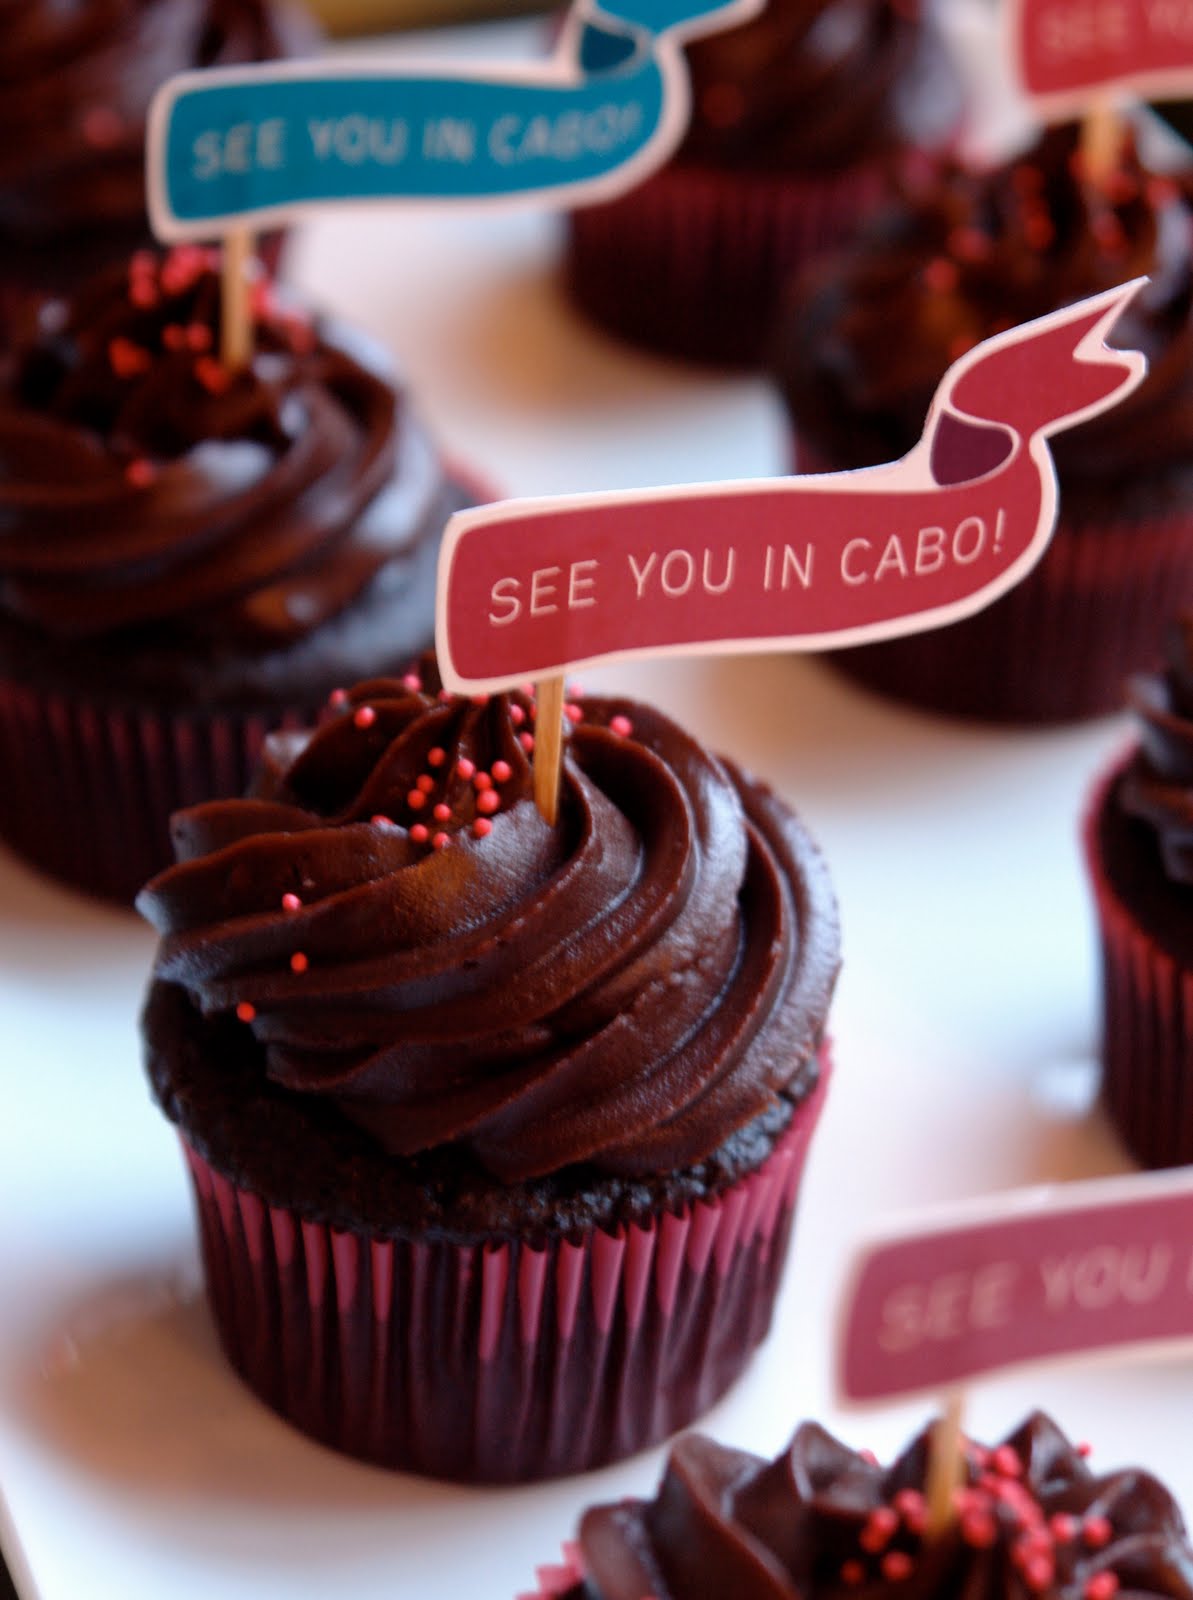
So I wish I could say that I have been waiting until the week of my friend Stephanie's wedding to post this but the truth is that I am so behind on my blogging that the fact that her wedding is this weekend is really a coincidence. With that said, I am still very excited to share these pictures and most importantly the template for the cupcake toppers I made. I made my chocolate Chambord ganache cupcakes as well as a chocolate whoopie pie with peanut butter filling (special request from the bride) for her wedding shower a few weeks ago. If you want to download the template for the cupcake toppers all you do is click on the image and then you can bring the file into photoshop or illustrator to add your own message. Or you can always just hand write on them. In this case her wedding is in Cabo, Mexico so I used the colors from her invitation designed by the talented Stamped Paper Co. and put "See you in Cabo" on the flags. Use a pair of sharp scissors and just glue a toothpick on the back to stick into the cake. Good luck!

Here is the recipe for the chocolate whoopie pie original recipe from Whoopie Pies:

  • 1 2/3 cups all-purpose flout
  • 2/3 cup unsweetened cocoa powder
  • 1 1/2 teaspoons baking soda
  • 1/2 teaspoon salt
  • 4 tablespoons stick unsalted butter at room temp
  • 4 tablespoons vegetable shortening
  • 1 cup packed dark brown sugar
  • 1 large egg
  • 1 teaspoon vanilla extract
  • 1 1/4 cup milk

  1. Preheat the oven to 375 and line baking sheets with parchment paper.
  2. Sift together the flour, cocoa powder, baking soda, and salt onto a sheet of waxed paper. In the bowl of a stand mixer fitted with the paddle attachment, beat together the butter, shortening, and browns sugar on low speed until just combined. Increase the speed to medium and beat until fluffy and smooth, about 3 minutes. Add the egg and vanilla and beat for another 2 minutes.
  3. Add half of the flour mixture and half of the milk to the batter and beat on low until just incorporated. Scrape down the sides of the bowl. Add the remaining flour mixter and milk and beat until completely combined (be careful not to over mix)
  4. Use a spoon or a pipping bag and drop about 1 tablespoon of batter onto your baking sheets and repeat, spacing them at least 2 inches apart. Bake for about 10 min each but keep on aye on them since smaller ones will cook faster.
*Let them cool completely before filling.

Sunday, September 4, 2011

Catfish Cake!


I know it sounds crazy but this was actually a pretty cute cake. A co-worker of mine ordered this cake for his daughters birthday. When he asked what she wanted she specifically asked for a green cake with blue frosting shaped like her favorite stuffed animal Oba the catfish. Well, I have not mastered cakes that are shaped like things so I offered up the idea of doing a mini cake for the birthday girl with cupcakes to go along with. Luckily that worked for them. I new I could pull off a small catfish made out of marshmallow fondant and a banner that said "Happy Birthday Clara Love Oba" - I made a vanilla cake with green food coloring and used a classic buttercream with blue food coloring. I also made grass/seaweed to go around the base of the cake out of fondant to make Oba feel at home :-)

Sports Themed Cake Pops


Basketballs, Baseballs, and Soccer balls! I got an order recently to make cake pops for a little boys class on his birthday and I wanted to share them with you. I think they turned out really well for never having made any sort of sports accessories before in the past. I used vanilla cake with white chocolate for the soccer and baseballs and orange for the basketballs. The trickiest part for me was the lines on the basketballs. When planning I thought I would just pipe them on with chocolate but that was nearly impossible. Then I thought I would draw them on with the edible markers but no one tells you that edible markers do not write on candy coating AT ALL! So my last idea was to use black food coloring watered down to make the stripes. I used a very small paintbrush and lightly painted the lines on. For the soccer balls I first cut out small stars in black marshmallow fondant using a star cookie cutter. I then used a sharp knife and cut off each point of the star which left me with little octagons just like a soccer ball has, I put a little melted white chocolate on the back of each one to act as glue. For the baseballs (my favorite) I just used a red frosting pen and piped out the red lines.

I will warn you - the black food coloring on the basketballs will get all over your mouth when you eat them but that is part of the fun! I went to the craft store and just got a simple white metal tin and put floral foam inside to hold up the cake pops with ease. Since I am crazy I also got some long grass from the floral section and cut it down to stick into the foam to simulate sports grass. It was the perfect stiffness to stick into the foam easily, and thanks to help from my friend Taryn we finished in no time. I really like to make the packaging fun when I am baking for a theme. I hope you enjoy the photos and try making them on your own at home...

Sunday, August 7, 2011

Dirt Cake

At my friends BBQ - I used gerber daisies, my favorite.

Sorry for the bad picture quality - this was taken with my phone on my kitchen table


This is one of my most fun desserts. When I was little my mom used to make this in the summertime when company would come over. We would eat dinner out on the back porch a lot in the summer so she would put this out as the centerpiece - not telling anyone it was actually dessert. She got a kick out of everyone faces when she would start spooning out the dirt from the pot into bowls for people to eat. To add to the fun she would use a hand trowel to scoop out the mixture. Recently I made this for my friends monkey baby shower, only I spread the mixture out into mini flower pots I purchased at ikea. I put 1-3 small daisies in each pot - really fun. I also made this for a friends BBQ and people loved it! It would make a great hostess gift if you purchased a fun flower pot and then left the pot and trowel with the hostess. Kids also love this and I can't wait to make it for my own one day. However you do it, its fun to not let anyone know that it's dessert until you are ready to serve. Keep in mind this should be eaten with a spoon in a bowl - it's not the most beautiful dessert once scooped but it tastes amazing! I apologize for not having a photo of the cake scooped out. Both times I made this in the past few weeks I was at a party and didn't have my camera ready when people dug in :-(

Ingredients:
  • 3 1/2 cup milk
  • 2 pkg vanilla instant pudding
  • 12 oz cool whip
  • 1/4 cup butter
  • 8 oz cream cheese
  • 1 cup confectioners sugar
  • 1 1/4 packages of Oreo cookies
  • Terra cotta pot
  • Hand garden trowel
  • Bouquet of flowers

Directions:
  1. In a large bowl cream together milk and vanilla pudding. Add in cool whip and mix together until just blended. Don't over mix.
  2. In another bowl cream together butter, cream cheese, and confectioners sugar.
  3. Blend both mixtures together and set aside.
  4. Using a food processor crush 1 1/4 bag of Oreo Cookies. The cream in the center will dissolve into the cookie crumb.
  5. Take your new clean terra cotta flower pot and make sure the hole on the bottom is plugged either with tinfoil or a plastic plug from a garden shop.
  6. Layer cookies with cream mixture starting with a cookie layer and ending with a cookie layer (for the dirt on top)
  7. Take your bunch of flowers cut the stems evenly and wrap the base of them in tinfoil. Place the flowers with the tinfoiled stems and put them right into the center of the pot up to the edge of the tinfoil so you can't see it. You can place more cookie mixture around the base of the flowers so not to see any foil. The mixture is thick enough to hold the flowers up.
* Refrigerate leftovers or if you make in advance refrigerate until you are ready to put it out on the table. It can be left out for about 2 hours otherwise it won't taste as good warm.
* you can also put gummy worms throughout the layers and on top for a kids party.
Related Posts with Thumbnails