Showing posts with label design. Show all posts

Tuesday, March 13, 2012

Strawberry Cupcakes


Just in time for spring! For some reason I associate strawberries with spring, maybe because I grew up in the North East? Down here in Texas where the seasons blend a little more, strawberries are never really not in "season." Lucky for me!

I made these for a birthday party that a client of mine was a hostess for. I had a lot of fun making the cupcakes but I might have had more fun making the monogram cupcake toppers. I used a chevron pattern in the same colors as the invitation and kept the monogram simple with a serif font rather than a script. And her monogram worked out to be ABC which I thought was very fun. These are super easy to make on your own, all you need are toothpicks, artists tape (white), scissors, and whatever your design is printed on a home printer is fine.

For the cupcakes I used a recipe from Sweetapolita - one of my favorite blogs. Her cakes are gorgeous! She has a great Strawberry frosting that goes well with this recipe on her site that I recommend checking out.

  • 1 3/4 cups sugar
  • 1 package of strawberry flavored gelatin
  • 1 cup butter, softened
  • 4 eggs (room temperature)
  • 3 cups sifted cake flour
  • 1 tablespoon baking powder
  • 3/4 teaspoon salt
  • 1 cup whole milk (room temperature)
  • 1 tablespoon vanilla extract
  • 1/4 cup strawberry puree made from frozen strawberries (puree itself should be closer to room temp, not frozen)

  1. To make the strawberry puree take your frozen strawberries and let them thaw out. I removed mine from the freezer the morning of and they were good to go by the time I got home from work. Place the thawed strawberries into a food processor and puree until smooth. Measure out 1/4 cup. You can freeze the rest to use again in the future.
  2. Preheat the oven to 350 degrees and place cupcake liners in your cupcake pan. Set aside.
  3. In a medium bowl, combine and stir the milk, strawberry puree, and the vanilla, set aside.
  4. Sift and whisk dry ingredients together in a medium bowl, set aside.
  5. In the bowl of an electric mixer fitted with the paddle attachment, cream the sugar, gelatin, and butter on medium speed until light and fluffy, about 5 min.
  6. Add the eggs, one at a time, mixing well after each one and scraping down the sides of the bowl with a spatula.
  7. Add the wet and dry ingredients to the creamed mixture by alternating - beginning and ending with dry ingredients. Don't over mix.
  8. Fill your cupcake liners 3/4 of the way full - I use a ice cream scoop to make sure they are all the same height.
  9. Bake for 20-25 min or until a toothpick comes out clean. Let them cool entirely before icing them.

Thursday, November 10, 2011

Beach Birthday Cake


Before I added the white chocolate shells.

All the shells set and dusted with edible glitter.

The birthday girl!

The demolished cake after they dug in.

It has been far too long since my last post so I wanted to make it a good one. This is one of the best cakes I have ever made so I am very excited to share it. It was for my Creative Director's daughter Isabelle's 14th birthday party. He and his wife wanted it to be a surprise, so they came up with a beach themed cake but also told me she liked neon colors so I did a sand colored buttercream frosting with white chocolate shells and then a basic white cake dyed in different shades of blue for the 4 layers. I love using this technique because it makes the inside of the cake really dramatic. They also told me she liked SpongeBob so I found a SpongeBob candle at the party store they added at the party as a surprise; he fit in seamlessly with the beach theme.

I used candy molds from the cake decorating store for the shells and sea horses. Once they were set I then dusted them with edible glitter to add shine and make them look even more realistic. I crushed graham cracker in the food processor for the sand and made the Happy Birthday flag in Illustrator. I prefer using the flags rather than piping the message on the cake so you can easily remove it. For the cake layers I made a classic white cake and then separated the batter into 4 bowls and dyed each one a shade of blue going from light to dark. The cake was a big hit and I am so proud of it. Hope you guys enjoy it!

Tuesday, October 4, 2011

Going to Cabo!


Click on the template to download the larger version


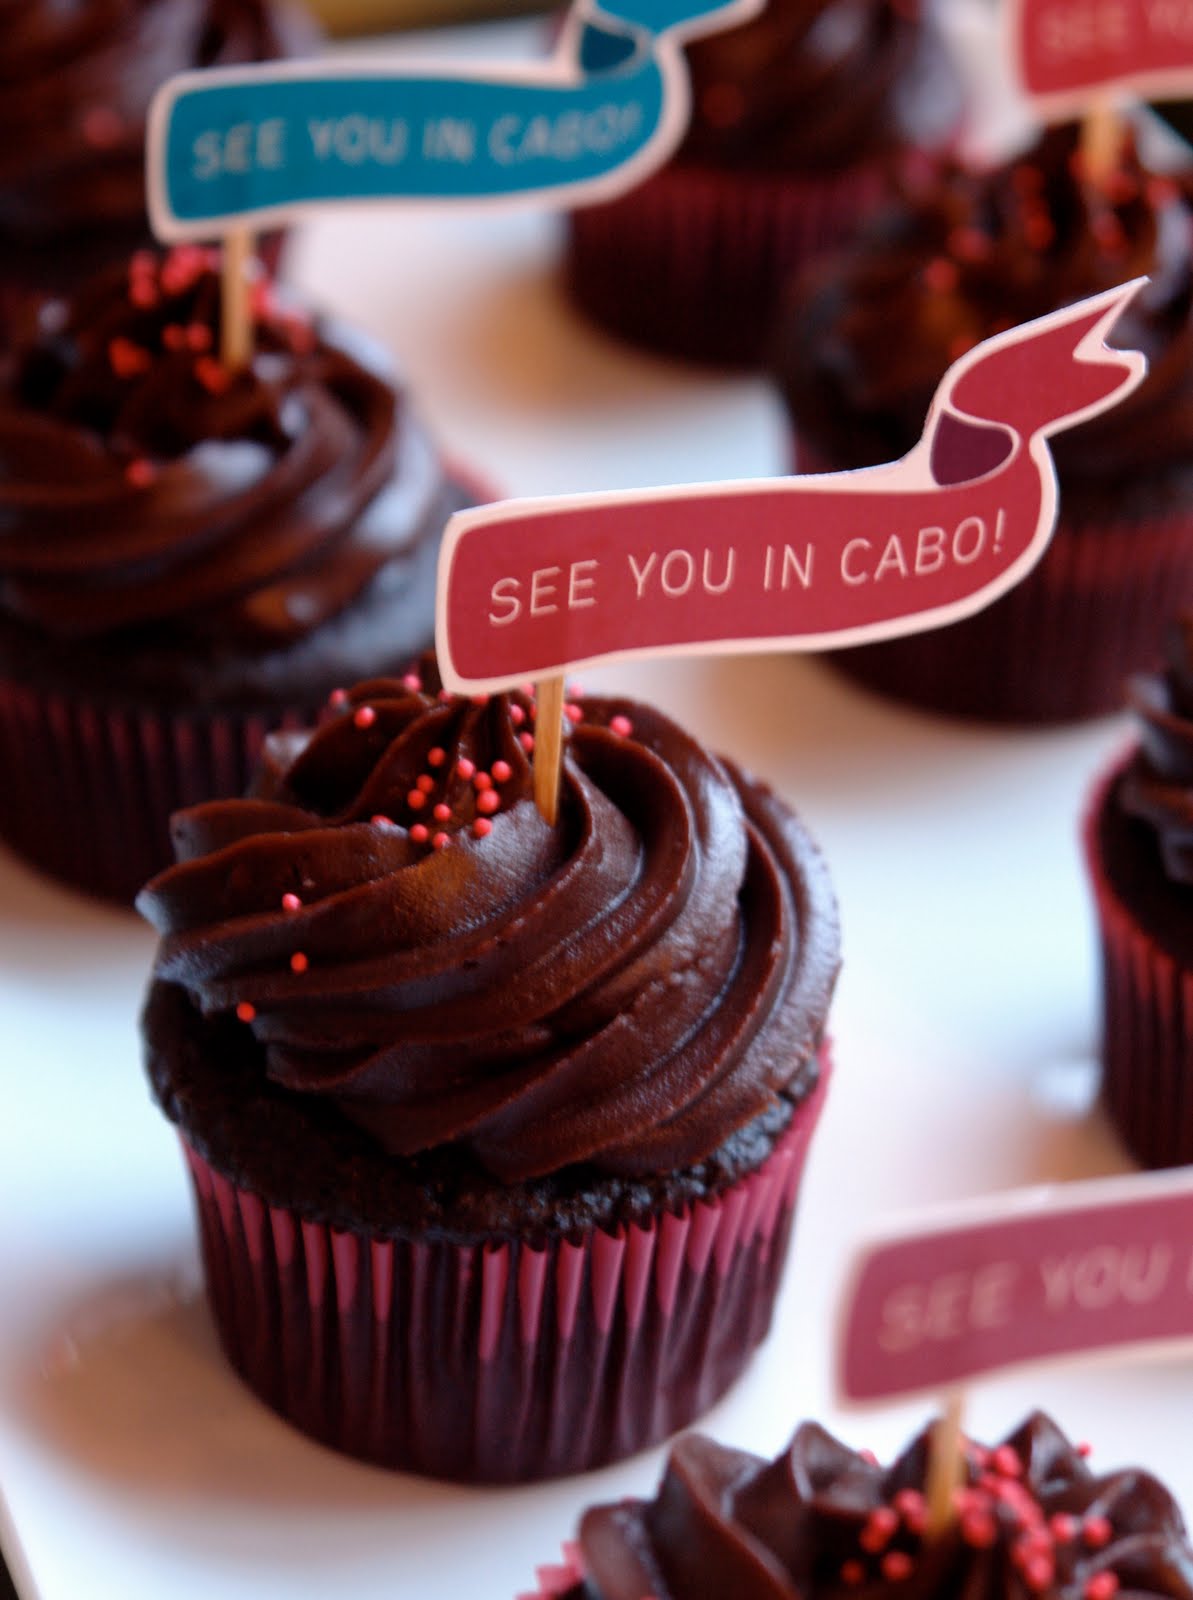
So I wish I could say that I have been waiting until the week of my friend Stephanie's wedding to post this but the truth is that I am so behind on my blogging that the fact that her wedding is this weekend is really a coincidence. With that said, I am still very excited to share these pictures and most importantly the template for the cupcake toppers I made. I made my chocolate Chambord ganache cupcakes as well as a chocolate whoopie pie with peanut butter filling (special request from the bride) for her wedding shower a few weeks ago. If you want to download the template for the cupcake toppers all you do is click on the image and then you can bring the file into photoshop or illustrator to add your own message. Or you can always just hand write on them. In this case her wedding is in Cabo, Mexico so I used the colors from her invitation designed by the talented Stamped Paper Co. and put "See you in Cabo" on the flags. Use a pair of sharp scissors and just glue a toothpick on the back to stick into the cake. Good luck!

Here is the recipe for the chocolate whoopie pie original recipe from Whoopie Pies:

  • 1 2/3 cups all-purpose flout
  • 2/3 cup unsweetened cocoa powder
  • 1 1/2 teaspoons baking soda
  • 1/2 teaspoon salt
  • 4 tablespoons stick unsalted butter at room temp
  • 4 tablespoons vegetable shortening
  • 1 cup packed dark brown sugar
  • 1 large egg
  • 1 teaspoon vanilla extract
  • 1 1/4 cup milk

  1. Preheat the oven to 375 and line baking sheets with parchment paper.
  2. Sift together the flour, cocoa powder, baking soda, and salt onto a sheet of waxed paper. In the bowl of a stand mixer fitted with the paddle attachment, beat together the butter, shortening, and browns sugar on low speed until just combined. Increase the speed to medium and beat until fluffy and smooth, about 3 minutes. Add the egg and vanilla and beat for another 2 minutes.
  3. Add half of the flour mixture and half of the milk to the batter and beat on low until just incorporated. Scrape down the sides of the bowl. Add the remaining flour mixter and milk and beat until completely combined (be careful not to over mix)
  4. Use a spoon or a pipping bag and drop about 1 tablespoon of batter onto your baking sheets and repeat, spacing them at least 2 inches apart. Bake for about 10 min each but keep on aye on them since smaller ones will cook faster.
*Let them cool completely before filling.

Tuesday, July 5, 2011

Baby Monkey Dessert Table

Whew! Finally doing another blog post with yet another baby shower dessert table. I realized it was time to sit down and post these images since the baby was born this weekend that this shower was held for. So exciting, and baby Avery is a beautiful healthy baby boy with two great parents.

Tracy (mommy) wanted a blue and brown monkey theme which I thought was great. Not only are monkeys cute they provide some great inspiration for banana themed desserts. I included the labels I made to show the full menu as well as to show the simple design. Just like the last dessert table I posted I hope to post some of the individual recipes but for now here are some images...

Color palate


labels - click to enlarge

Peanut butter chocolate layer cake

Mini Dirt Cakes

Chocolate and vanilla cake balls

Oreo stuffed chocolate chip cookies

Mini banana nut cupcakes

mini monkey breads

Supply sources:
Brown and white striped cups and blue and white polka dot cups, and blue and white striped straws: http://www.shopsweetlulu.com/
Blue and white polka dot platter: www.ikea.com
Ruffled edge platter: www.sweetandsaucysupply.com/

Wednesday, May 25, 2011

My first dessert table...


I have more images and recipes coming soon but I wanted to share this first batch with everyone. This was for my friends baby shower. They are having a little boy and they wanted green brown and white. No theme - just elegant baby...


the color palate

S'more marshmallows and white chocolate lemon truffles

Popcorn and Lemon Coconut 4 layer cake

I ordered these adorable green and white straws online to go
with Skinny Girl Margaritas to carry out the green theme

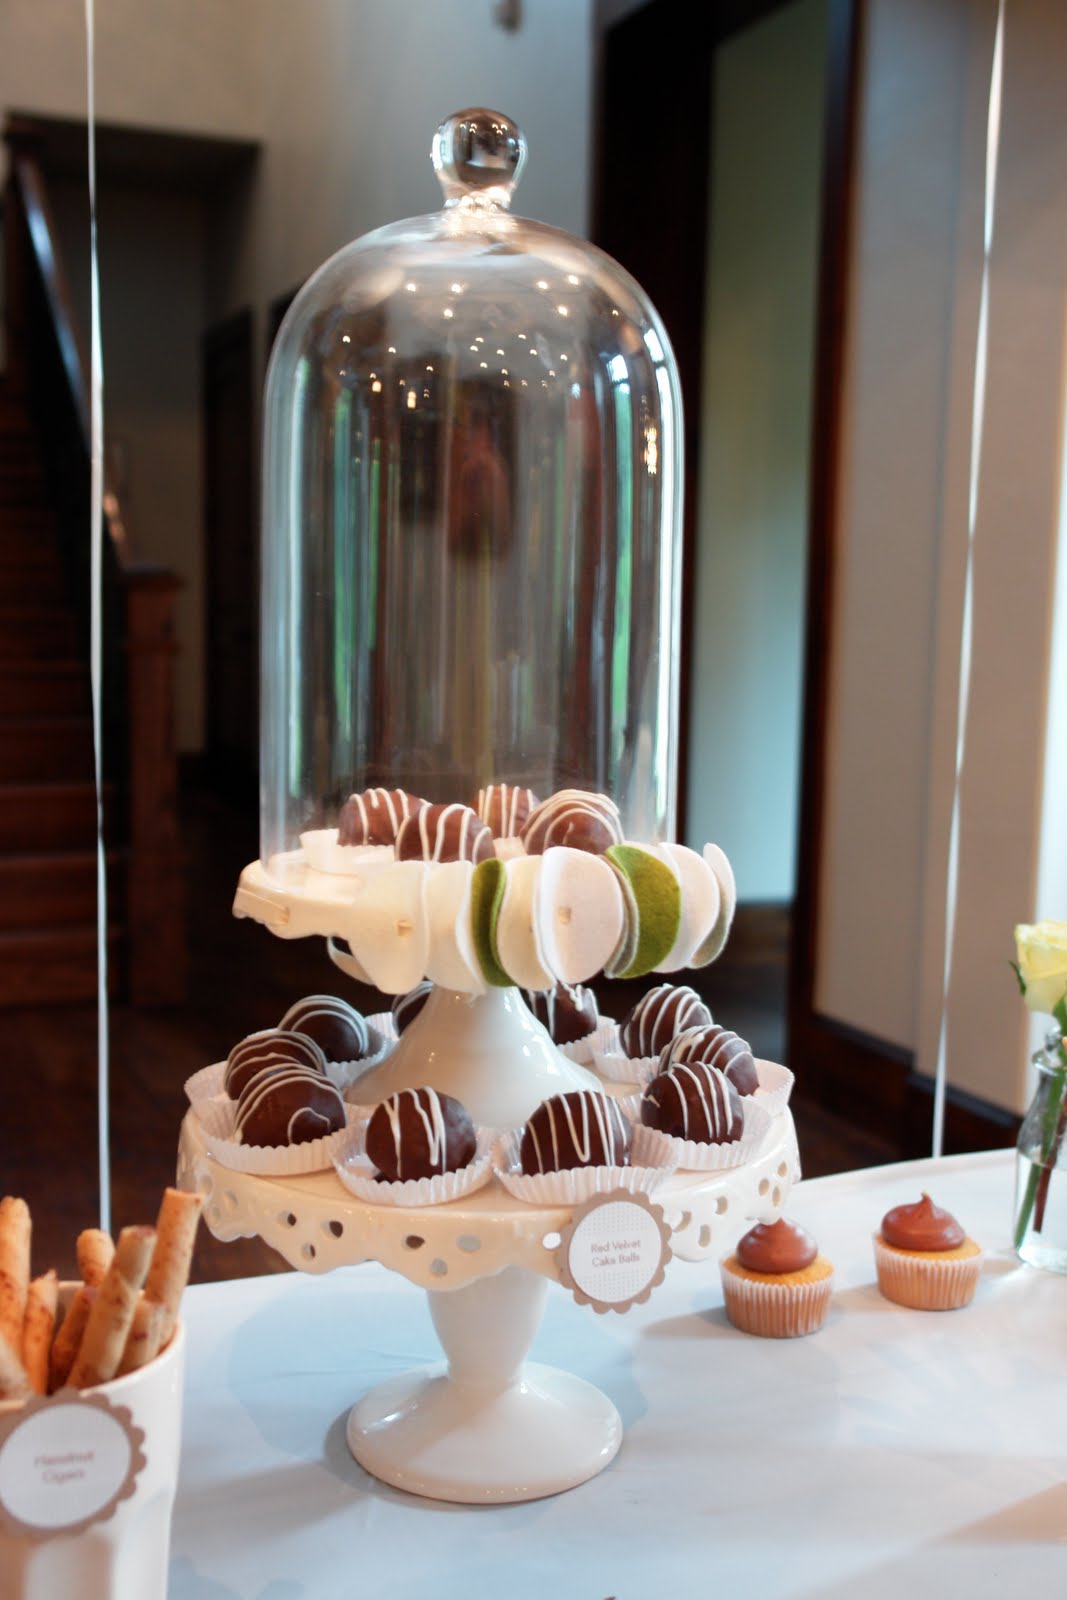
Red velvet cake balls

Lemon blueberry poppy seed bread with lemon glaze

Yellow cupcakes with chocolate cream cheese frosting

Here are some more amazing photo's from the Dad - they turned out
great and you can really see the little labels I made... thanks Aaron!


I used a little green food coloring to get a green gradient in the cake, everyone loved this


Related Posts with Thumbnails